Configure Cluster Quorum
Introduction
In this lab, you will learn how to configure cluster quorum
Objectives
At the end of this lab, you will be able to:
- Configure a node and file share majority quorum for a Windows Server 2022 Failover Cluster
Estimated Time
20 minutes
Logon Information
Before Login make sure windows has Applied Computer Setting to all nodes.
Use the following credentials to login into virtual environment
Connect to AlwaysOnClient as Corpnet\Cluadmin using Pa$$w0rd as the password.
Click the Type Text icon to enter the associated text into the virtual machine.
Connect to AlwaysOnN1 as CORPNET\Administrator using Pa$$w0rd as the password.
Click the Type Text icon to enter the associated text into the virtual machine.
Connect to AlwaysOnN2 as CORPNET\Administrator using Pa$$w0rd as the password.
Click the Type Text icon to enter the associated text into the virtual machine.
Connect to AlwaysOnN3 as CORPNET\Administrator using Pa$$w0rd as the password.
Click the Type Text icon to enter the associated text into the virtual machine.
Connect to AlwaysOnDC as Administrator using Pa$$w0rd as the password.
Click the Type Text icon to enter the associated text into the virtual machine.
Change the screen resolution if required.
You may want to adjust the screen resolution to your own preference. Do this by right-clicking on the desktop and choosing Screen resolution and clicking OK when finished.
Exercise 1: Configure Cluster Quorum
In this exercise, you will learn how to configure cluster quorum.
Task 1: Create file share and assign permissions
In this task, we will create a file share named FS on the domain controller AlwaysOnDC. Then we will assign permission to the CNO on the file share \\AlwaysOnDC\FS
Sign in to AlwaysOnDC as Administrator using Pa$$w0rd as the password.
Click the Type Text icon to enter the associated text into the virtual machine.
Open File Explorer and create a folder called FS on the c drive (C:\)
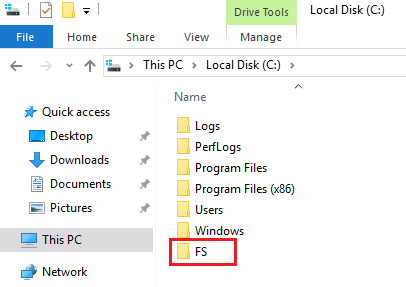
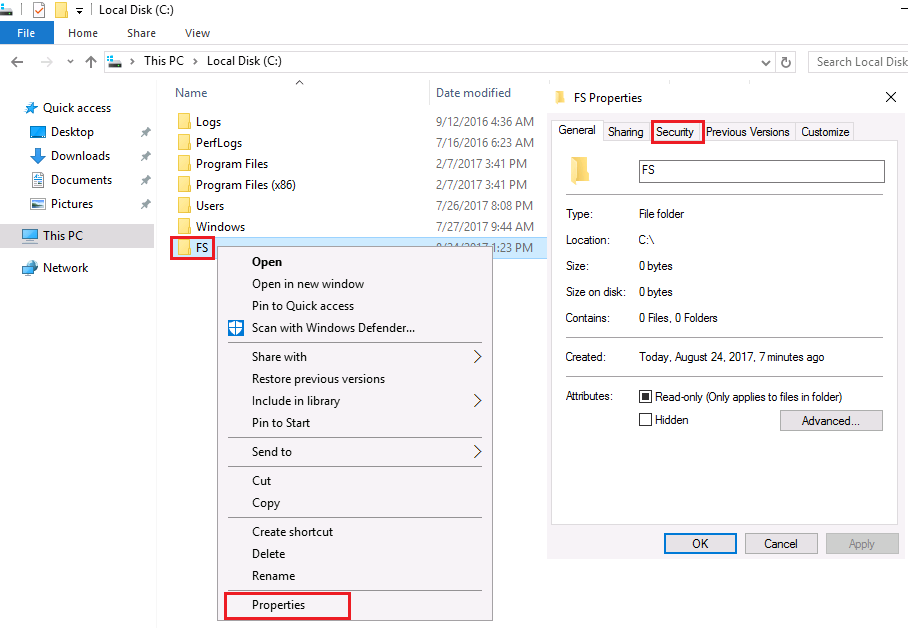
Right click FS folder and select Properties -> Security tab.
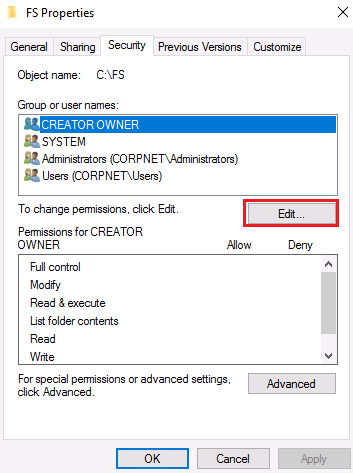
In the Security tab, click Edit.
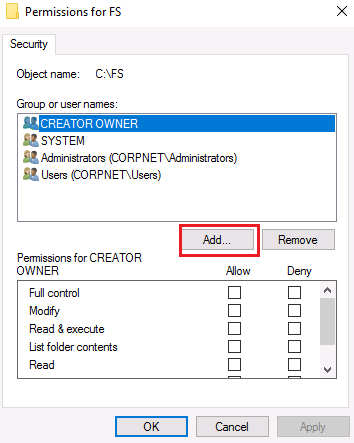
In the Permissions for FS window, click Add.
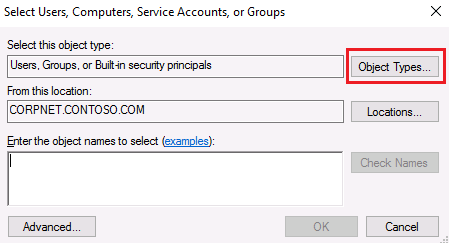
In the Select Users, Computers, Service Accounts, or Groups window, click Object Type.
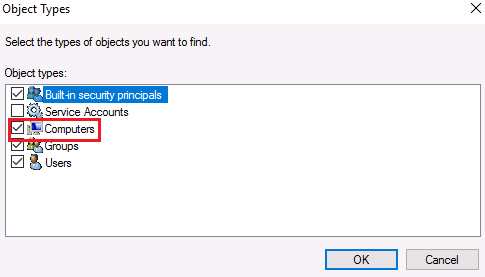
In the Object Types window, check Computers and click OK.
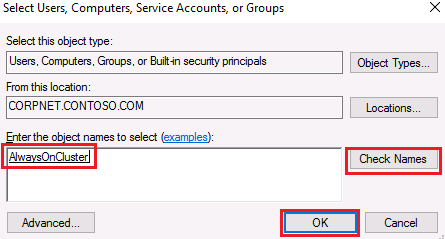
In the Select Users, Computers, Service Accounts or Groups window, type AlwaysOnCluster in the Enter the Object names to select box and click Check Names, then click OK.
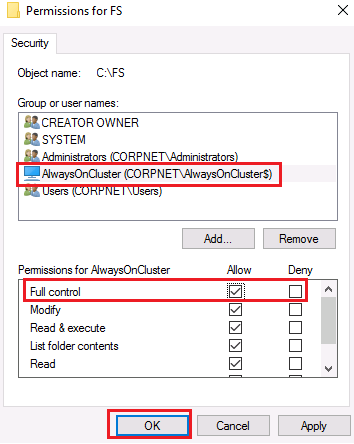
In the Permissions for FS window, check Full Control and click OK.
Click the Sharing tab and click Share.
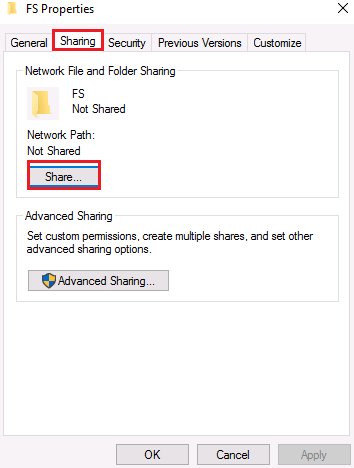
In the File Sharing window, ensure that the CNO AlwaysOnCluster$ has Read/Write permissions.
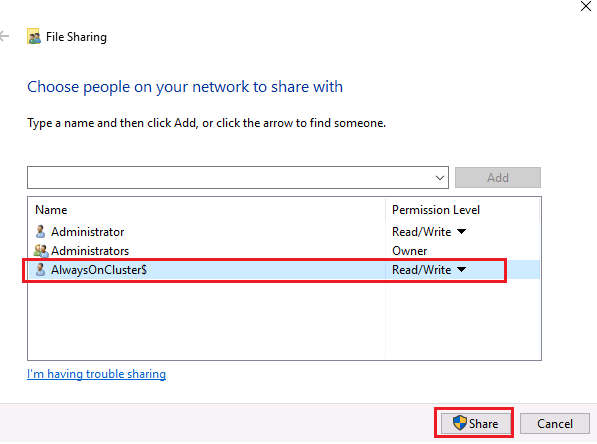
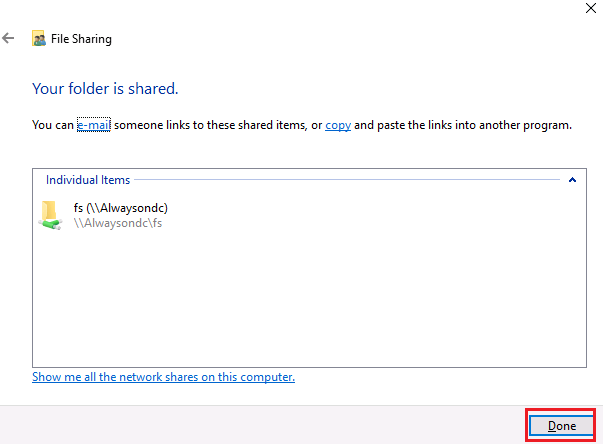
Click Share, then click Done.
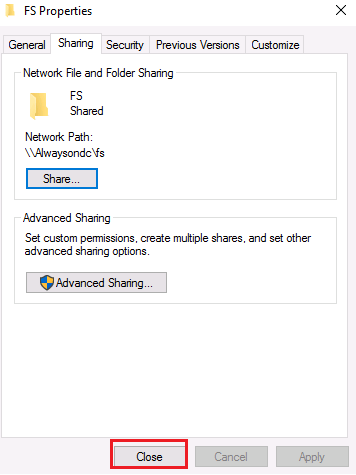
Click Close.
Task 2: Configure Cluster Quorum using Failover Cluster Manager.
In this task, we will configure cluster quorum.
Sign in to AlwaysOnN1 as CORPNET\Administrator using Pa$$w0rd as the password.
Open Failover Cluster Manager.
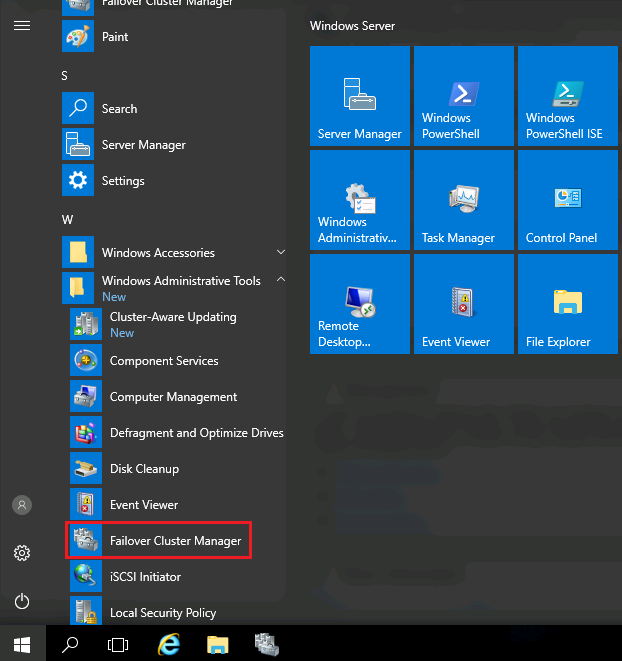
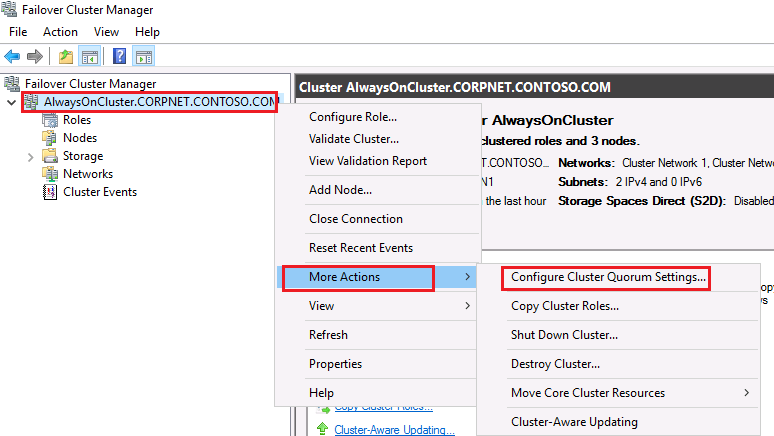
Right-click the AlwaysOnCluster, click on More Actions, and then select Configure Cluster Quorum Settings.
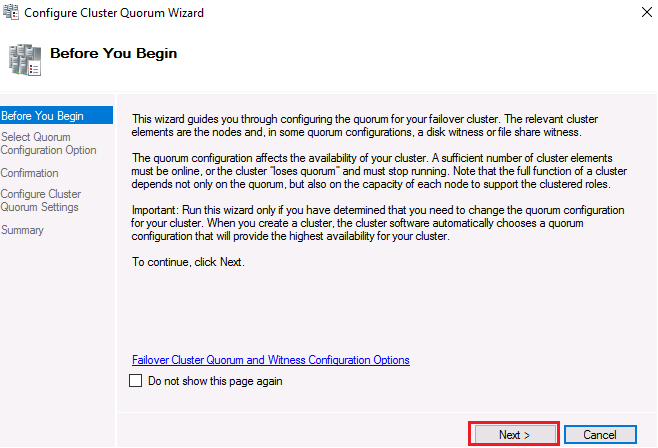
Review the Before You Begin page on the Configure Cluster Quorum Wizard, and then click Next.
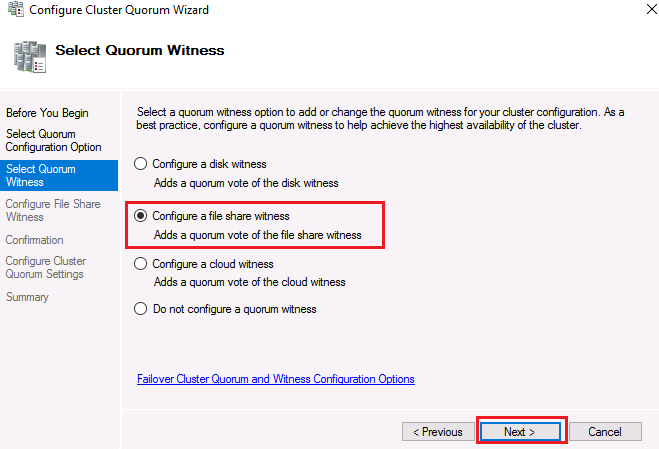
Choose the Select the quorum witness option and click Next.

Choose the Configure a file share witness option and then click Next.
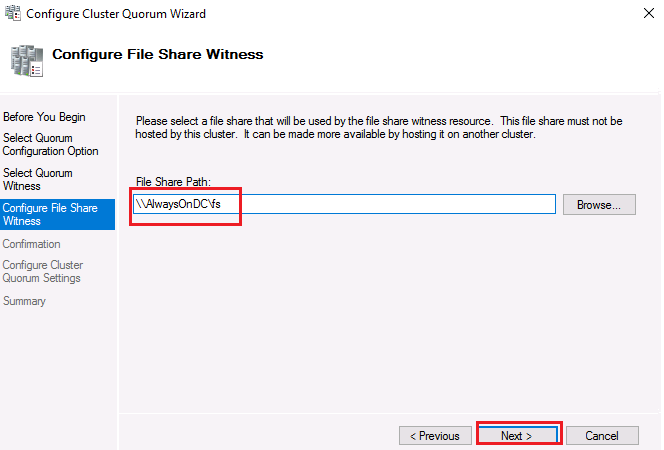
On the Configure File Share Witness page, type \\AlwaysOnDC\FS in the File Share Path box and then click Next.
\\AlwaysOnDC\FS is the file share we configured in the previous task on the DC.
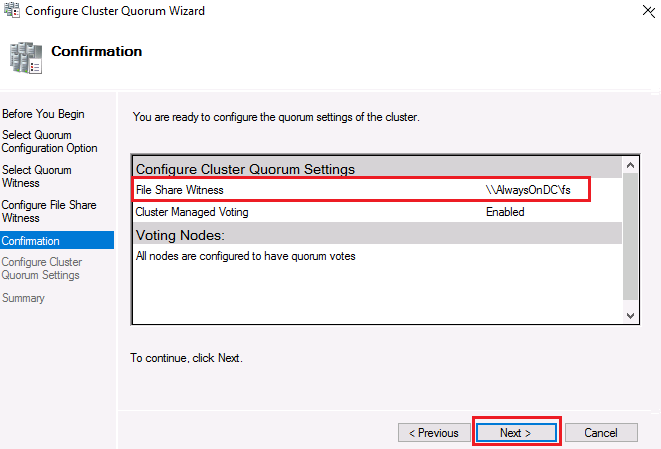
Review the information on the Confirmation page, and then click Next.
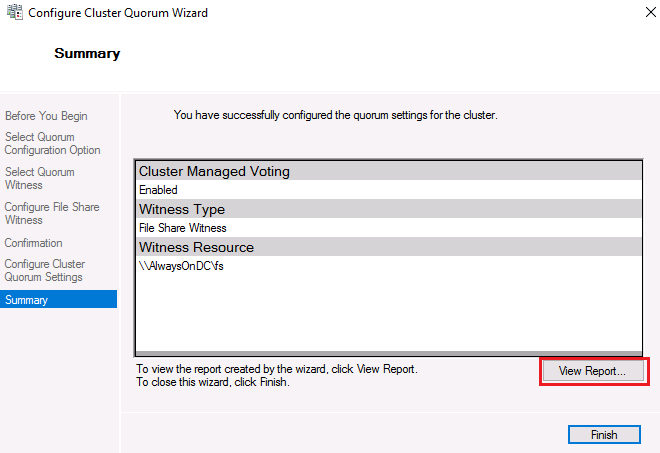
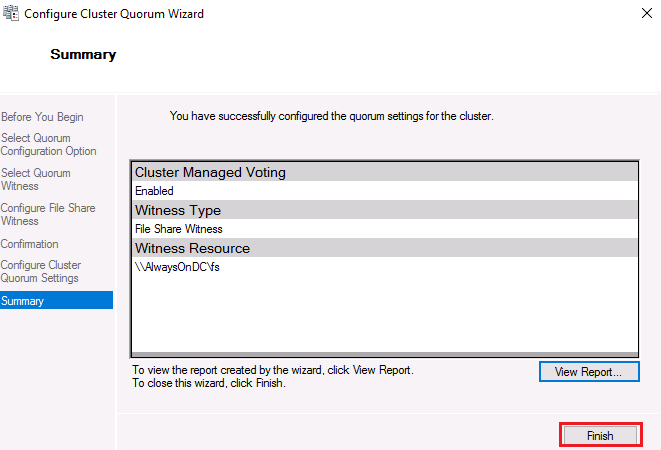
On the Summary page, click View Report.
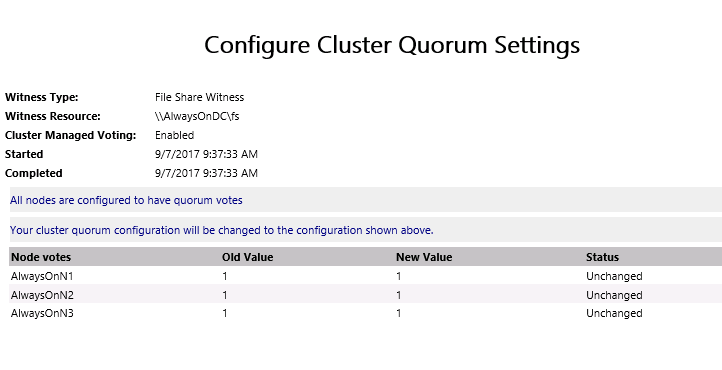
Review the information on the report, then close the browser window.
On the wizard Summary page, click Finish.
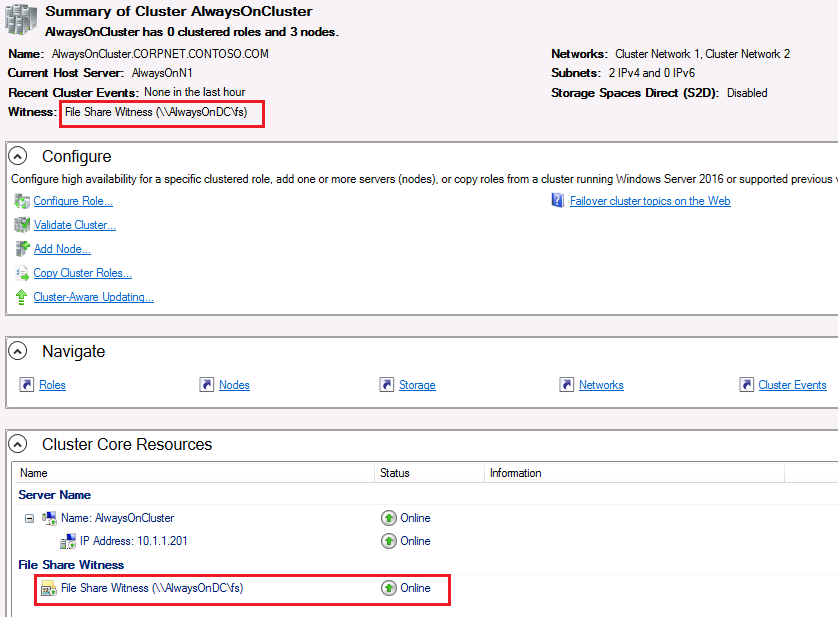
In Failover Cluster Manager, review the Summary Page (middle pane).
To configure a quorum using PowerShell, you can use the Set-ClusterQuorum cmdlet.
Example: Configure file share witness
Set-ClusterQuorum –NodeAndFileShareMajority \\AlwaysOnDC\FSReview the report in "C:\Windows\Cluster\Reports" folder, to check for any warnings.
More details can be found here
Congratulations!
You have successfully completed this exercise. You can move to the next lab.